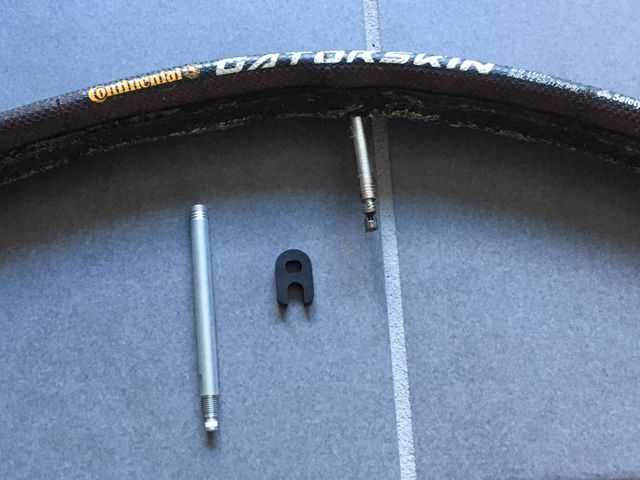
Changing your valve extender: simple and practical.
With the advent of high rims, it is often necessary to change the valve extender on your bike. This inexpensive and quick installation will save you considerable time when pressurising your tyres.|>
Here are the steps to follow for correct installation of the valve extender.
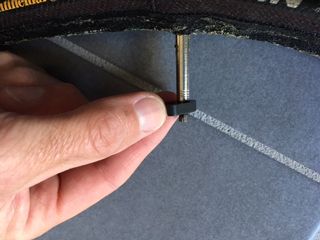
Removing the valve extension cap.
The original hose often has a valve or a removable cap. Use the small tool provided in the Continental packaging to loosen this cap. Always hold the valve to prevent it from turning (and tearing inside the inner tube).|>
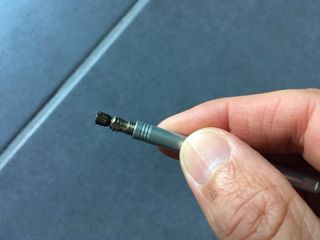
Mounting the valve on the new valve extender.
You can now replace the shell on the new valve extender by hand. When you are done, simply turn it a quarter turn to tighten it properly.|>
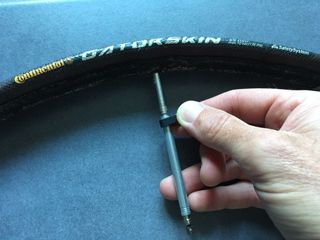
Once in contact, a quarter turn is enough to lock the extension onto the original valve. Now screw the valve extender in by hand until you feel it make contact. Using the small Continental tool, turn it a quarter turn to lock it in place, holding the original valve to prevent it from turning. You can now mount your tube on your rim.|>
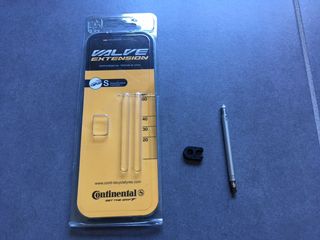
There are also several lengths available to fit your rim profile harmoniously.
There are also different lengths of extenders. For a 40 mm rim, we recommend using a 30 mm extender. For a height between 40 and 55 mm, you can choose a valve extender length of 40 mm. Finally, for 60 to 80 mm, we recommend a 60 mm extension.
Tips and tricks for fitting your valve extension
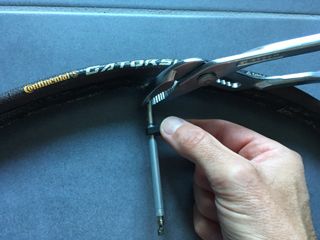
To avoid permanently damaging the air chamber, it is also useful to use pliers.|>
A few tips: it is possible to reuse a valve core a second time. To do this, do not tighten it too much when first installing it, so as not to crush the seal, which would make it unusable. This also applies to the extension. If you are unsure about the length of the valve extension to use, try it out first without any air in the tyre. You can assemble the whole thing without gluing it to the wheel and check if it suits you. Good luck with the assembly, everyone!|>
Loading...
Suggestions

TOP SEARCH CATEGORY
- Cassette
- Helmet
- Saddle
- Bottle
- Chain
- Chainring
- Tyre
- Tape
- Stem
TOP BRAND SEARCH
- Assos
- Garmin
- Gobik
- Castelli
- Pinarello
- Shimano
TOP PRODUCT SEARCH
- Shimano Ultegra CS-R8000 11-speed cassette
- Road tyre Continental Grand Prix 5000
- Shimano 105 R7000 11-speed road bike cassette
Products
No results in products
No results in categories